When we left off before, we had just finished the enclosure box and wired up some lighting. This is where I left it for a good number of months as life, work and other things got in the way, opting to use the printer instead of fiddling with everything. However, with some big life events coming up, I opted to make the plunge and get as much done as possible.
Compute
First off, I wanted to move the Raspberry Pi running OctoPrint from the mounting on the printer to outside the enclosure. Now that the box itself could get to nearly 50ºC ambient, the Pi was having trouble passively cooling. I didn't want to have to install active cooling as the CPU load really didn't warrant it, it made sense to move it outside. At the same time, I wanted to move my control panel to the exterior where it made sense. I'll write up another article on that in the future, but one of the first things I did after getting OctoPrint set up was to design and build a control panel module that sat on the printer that let me see print progress, some basic system stats, and do pause, resume and abort without having to pull up the web UI. If it was inside the enclosure, it wasn't all that useful. I could see it, but I couldn't interact without opening the doors and letting all that heat out and humidity in. Here is where the use of 2020 extrusions really shines, as I can pick any edge to mount something and it just takes some bolts and t-nuts.
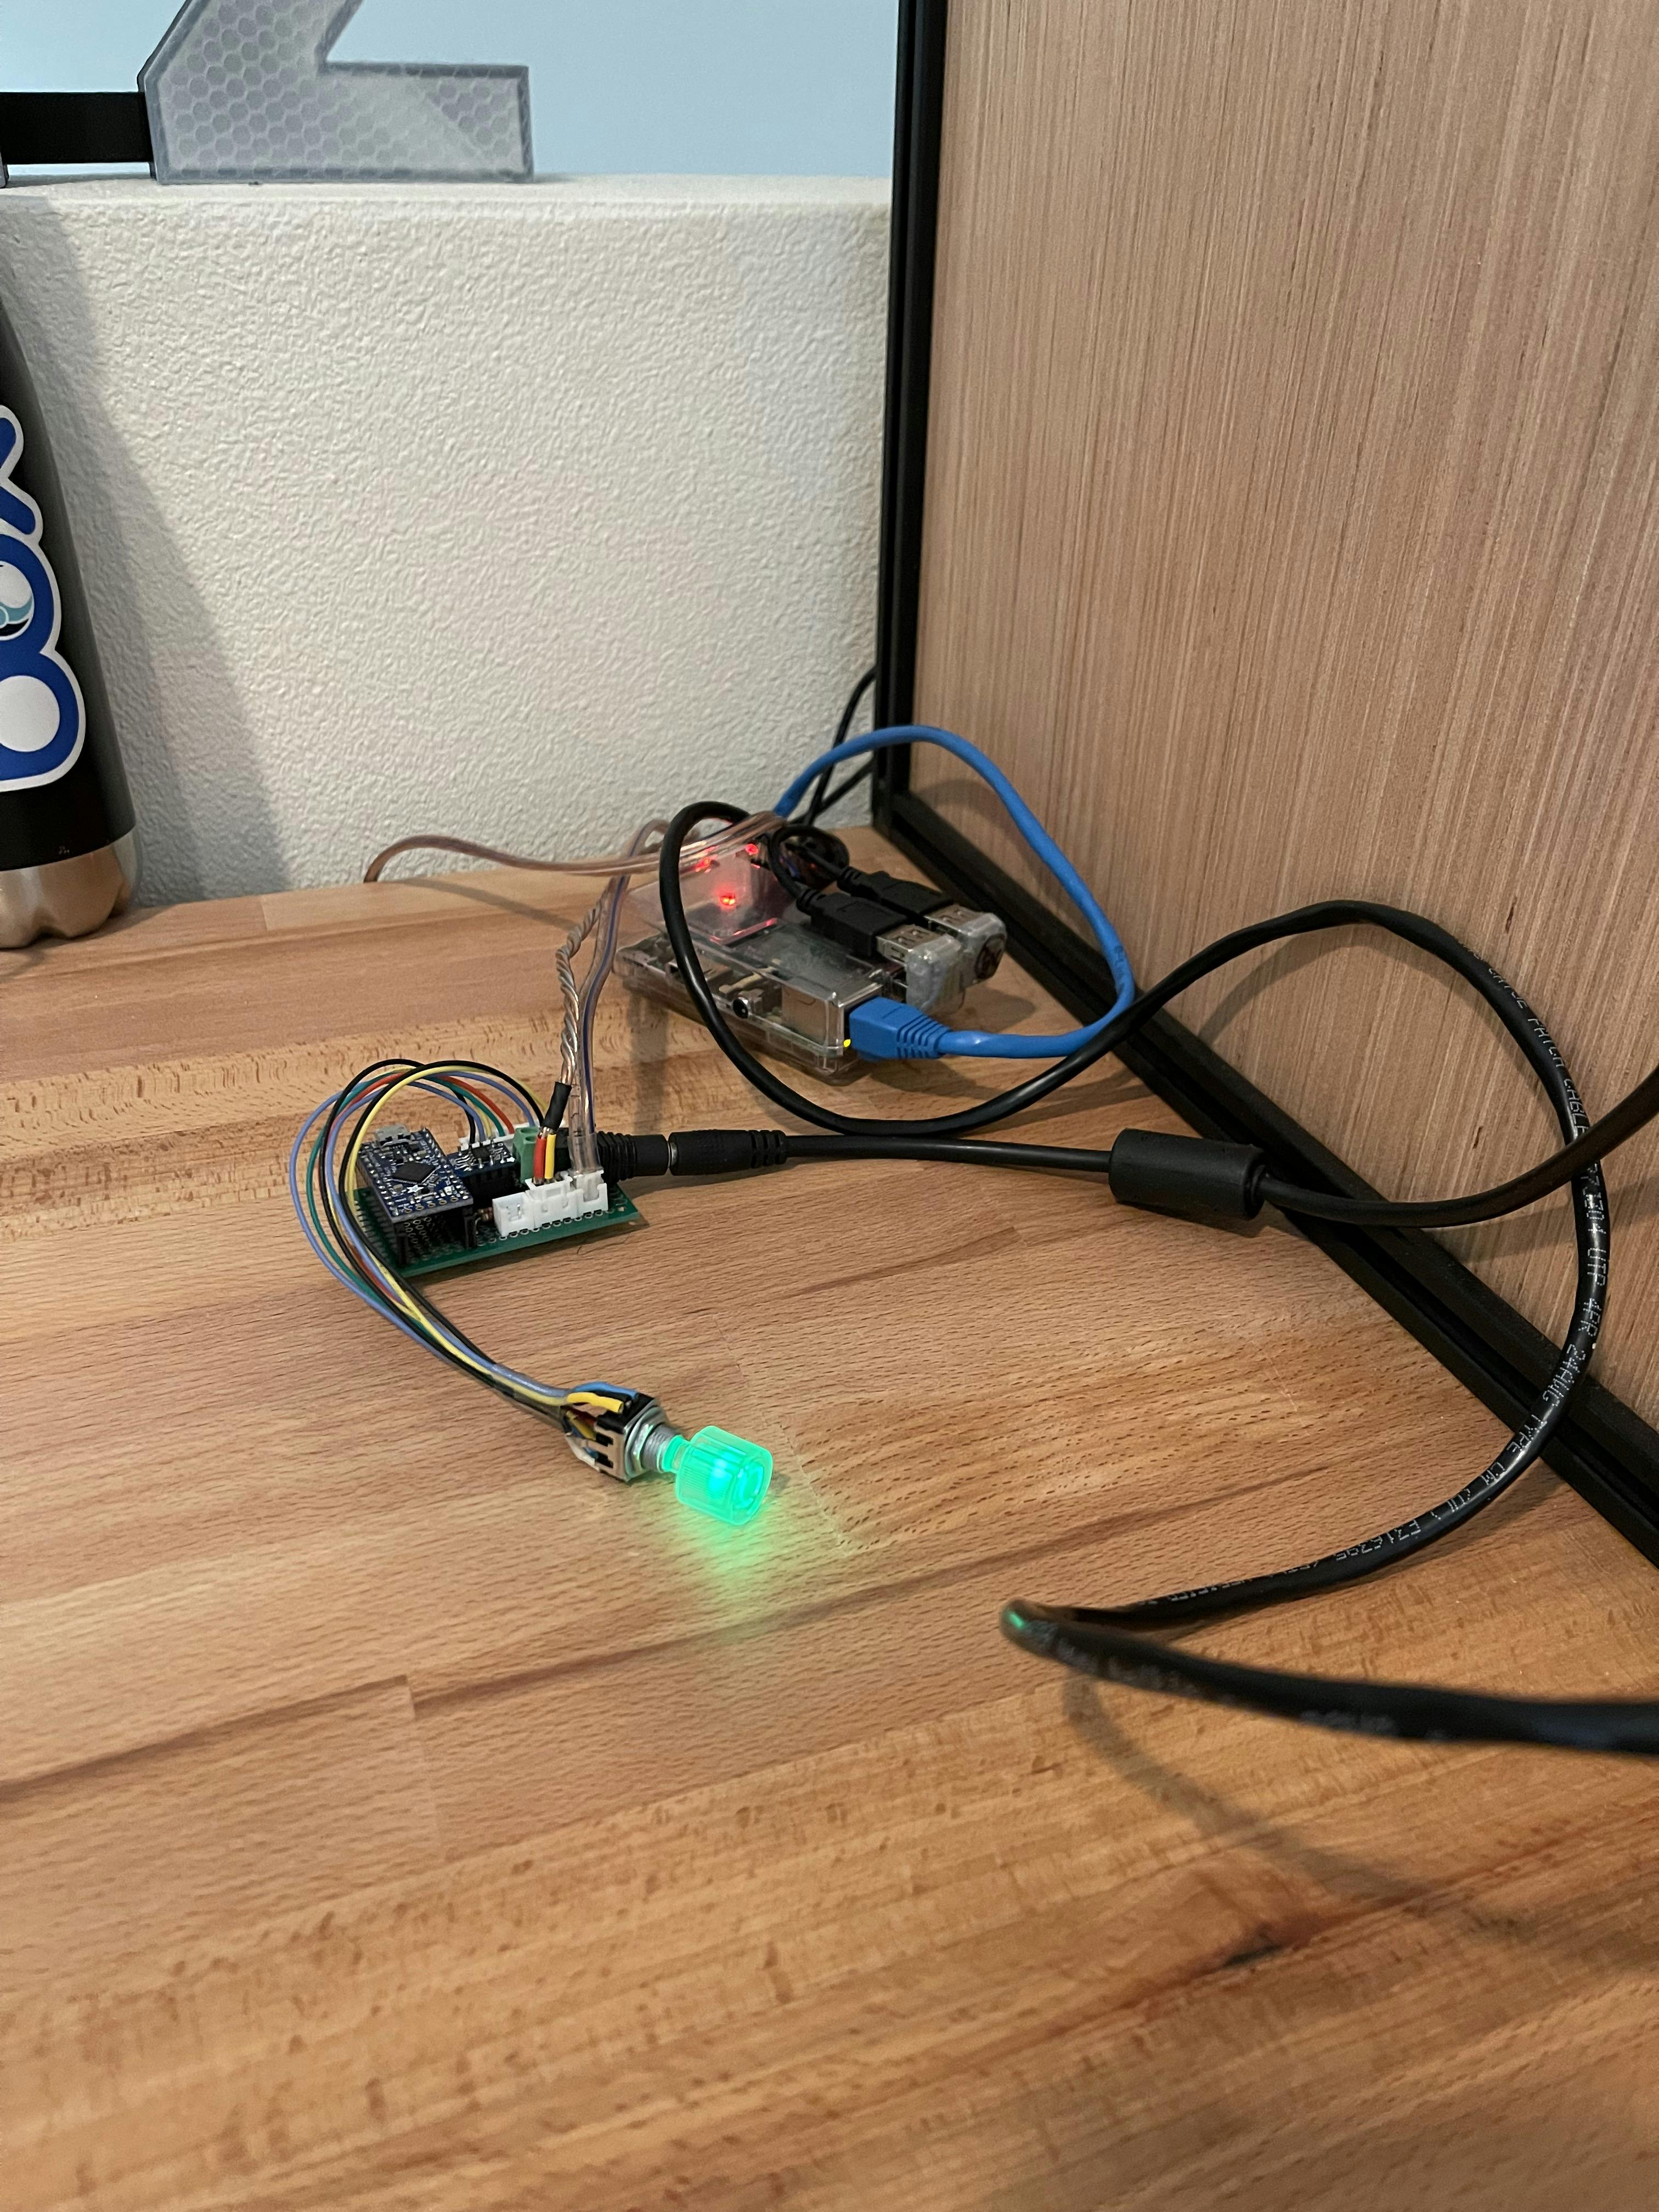 Fig 1. Move the OctoPrint Pi and various control bits outside.
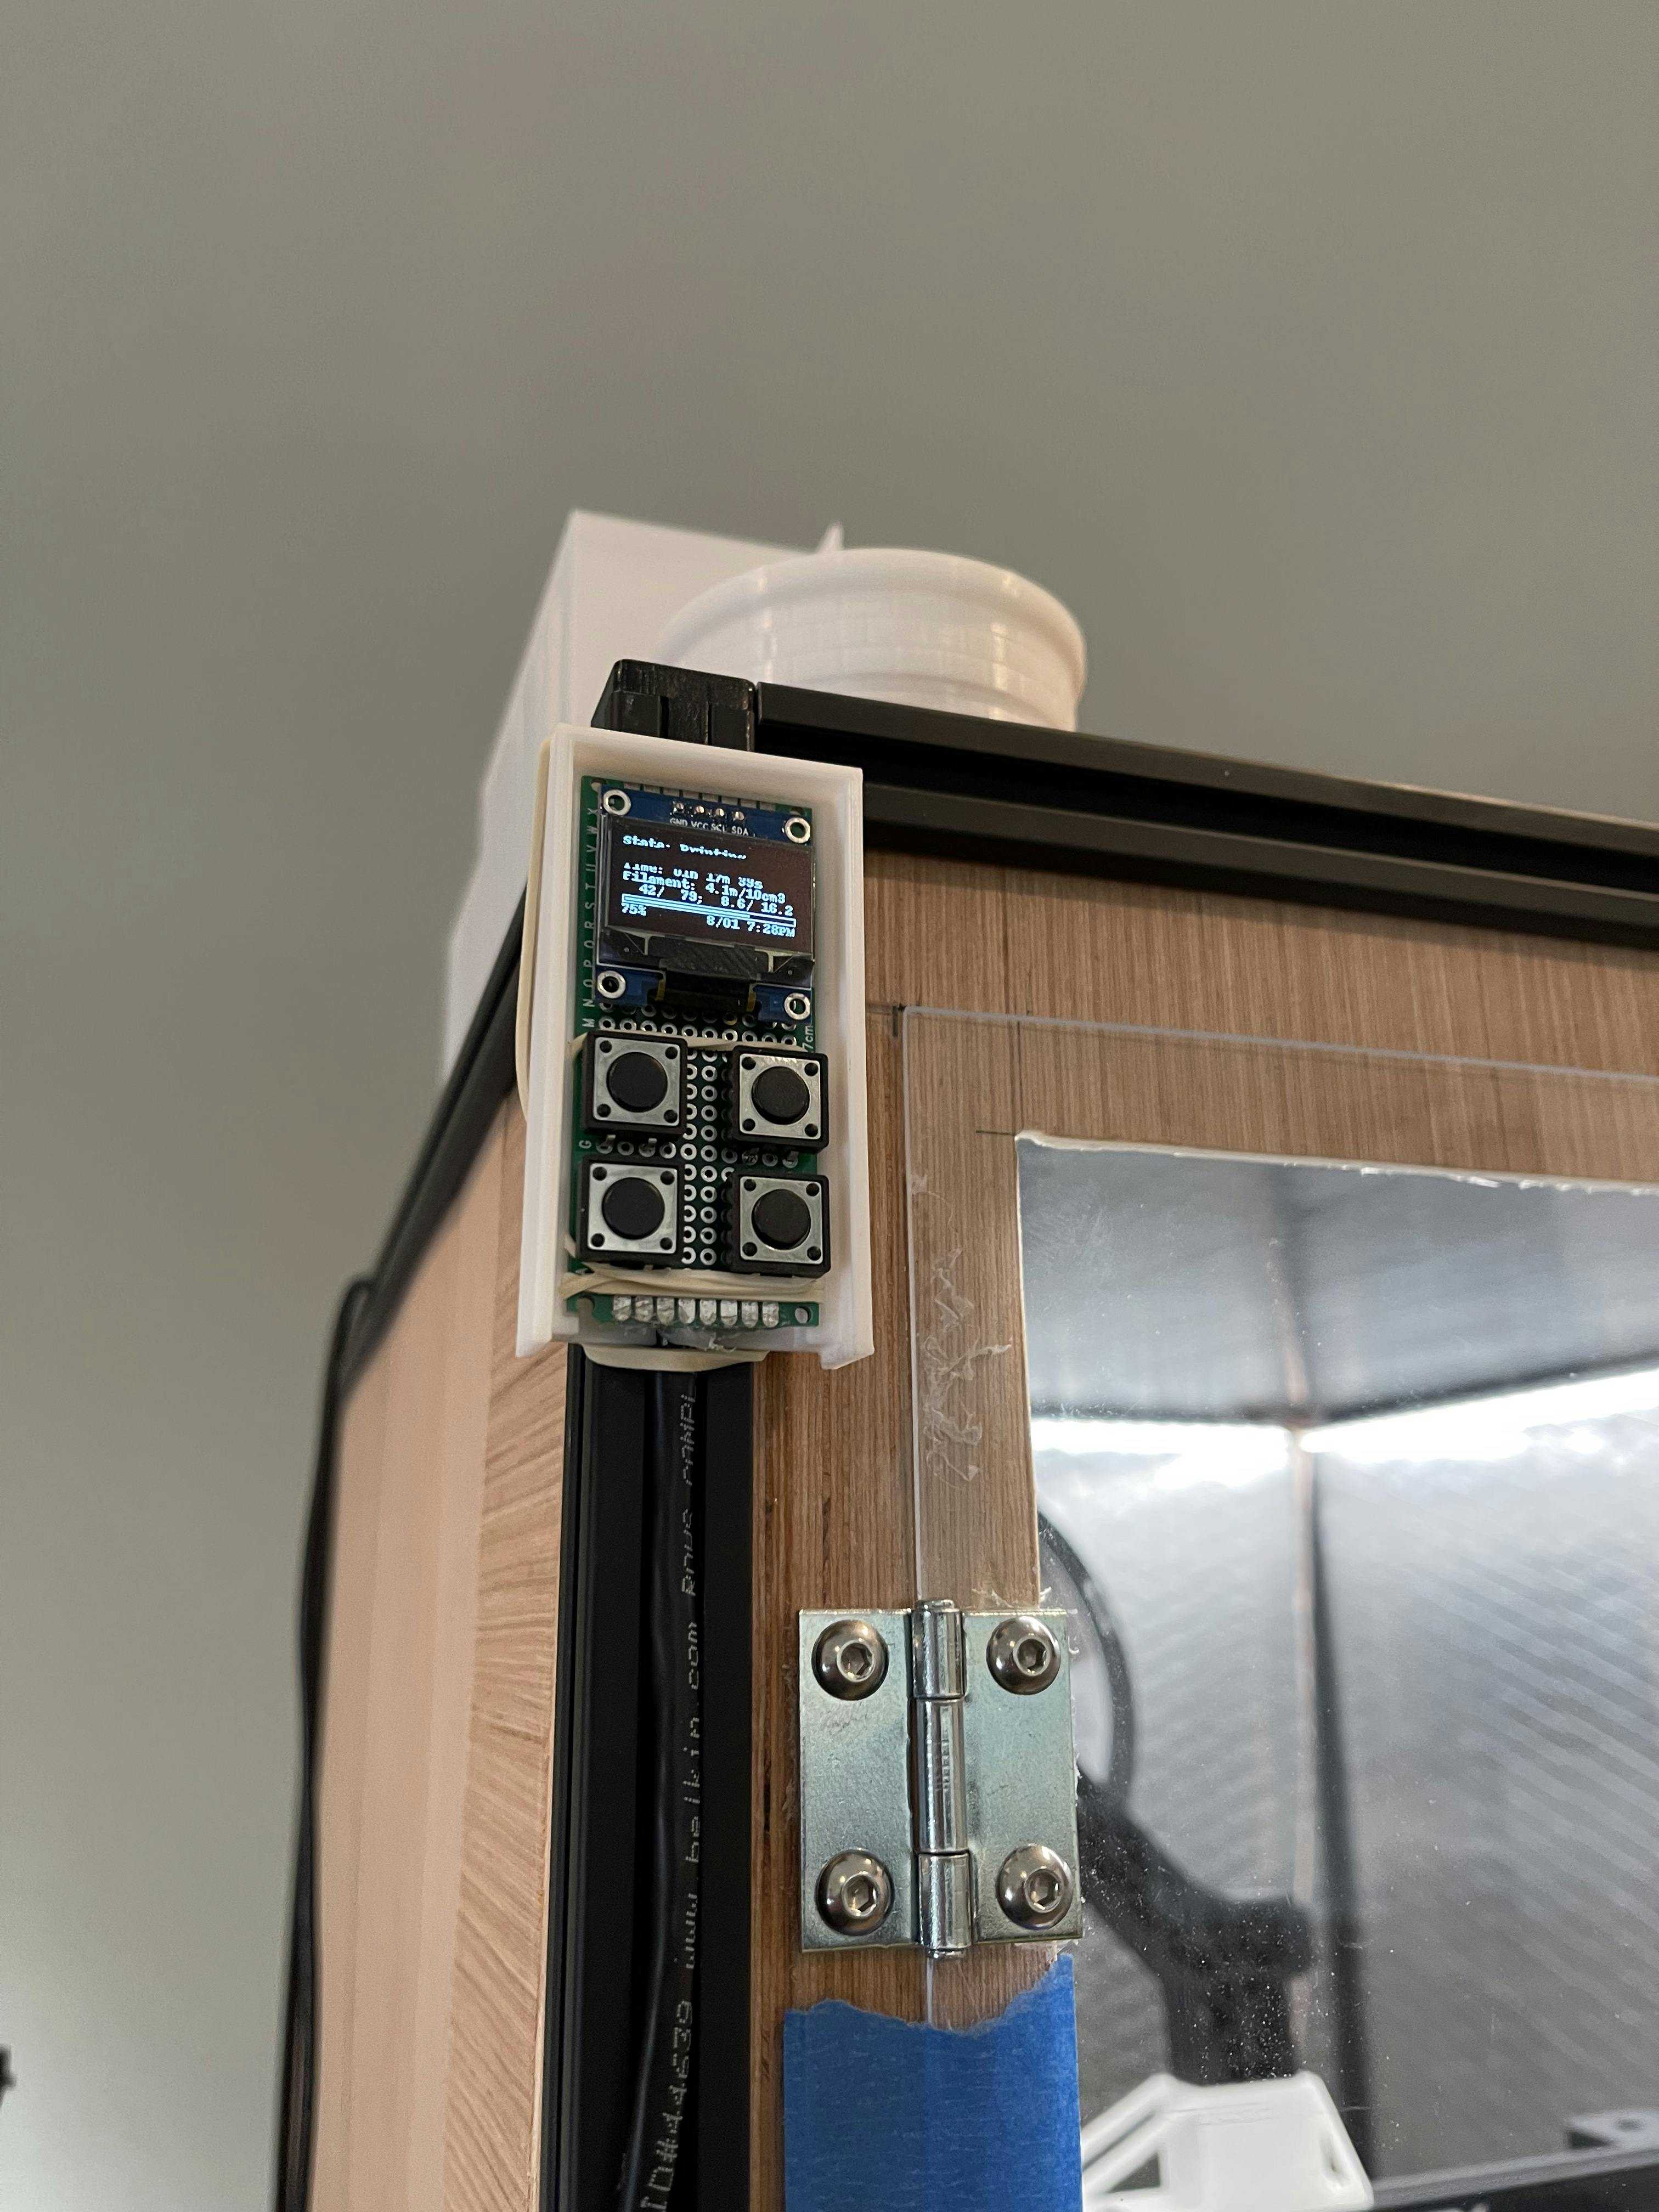 Fig 2. Get the control panel out and mounted up to the external rails.
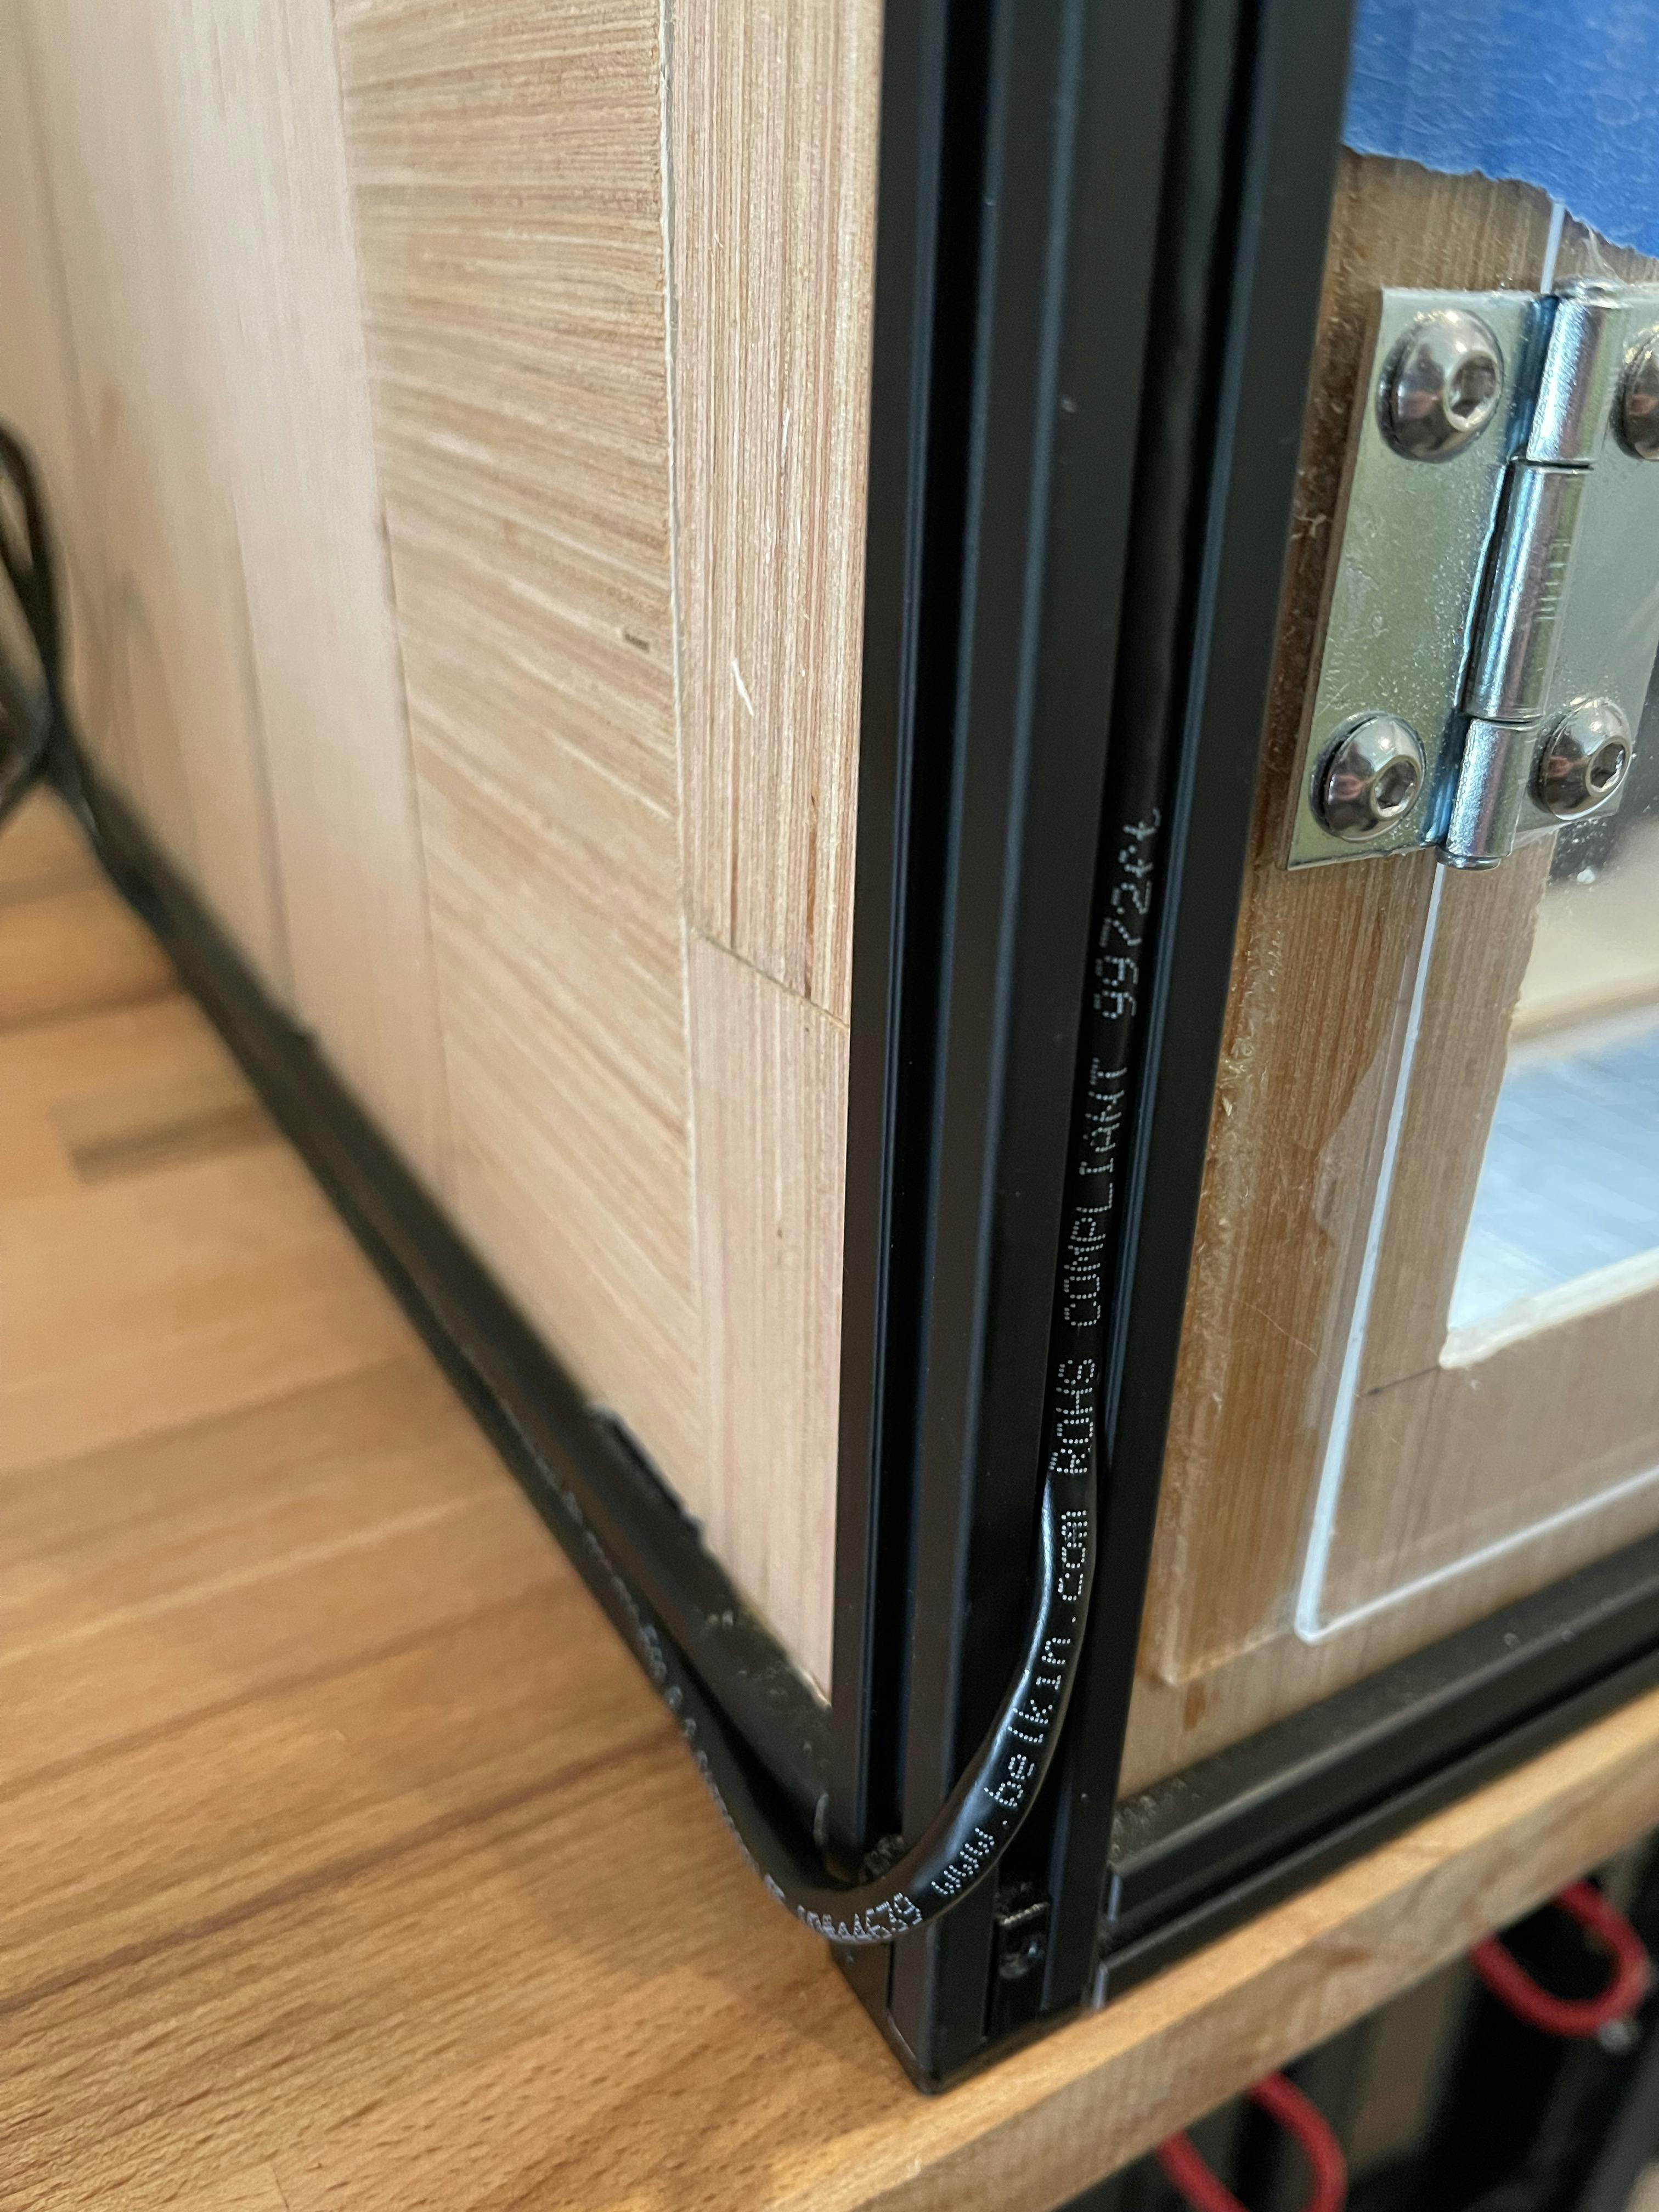 Fig 3. Clean up the wiring using some space Cat5 cabling instead of a bunch of patch wires
Plan, Meet Reality
While thinking through how I wanted to hook everything up, I started with the idea that there were too many power cords for this setup and that I would prefer to have one power brick that would provide juice to the Raspberry Pi, extraction fan in the enclosure, and the LEDs. The power would come in to a main board, be broken out to a second board to drive the LEDs, be passed into the Pi over a second cable, and passed through a DC-DC boost converter, stepping it up to 12v to drive the fan. Wanting to prototype things quickly, I set out laying out the components onto one of the many PCBs in the shape of a half breadboard. This gave me a good feel for how much room I would need, and then I could transfer that over to paper to draw in wires and validate against the schematics I had drawn up for the power switching and all the parts I wanted to interconnect.
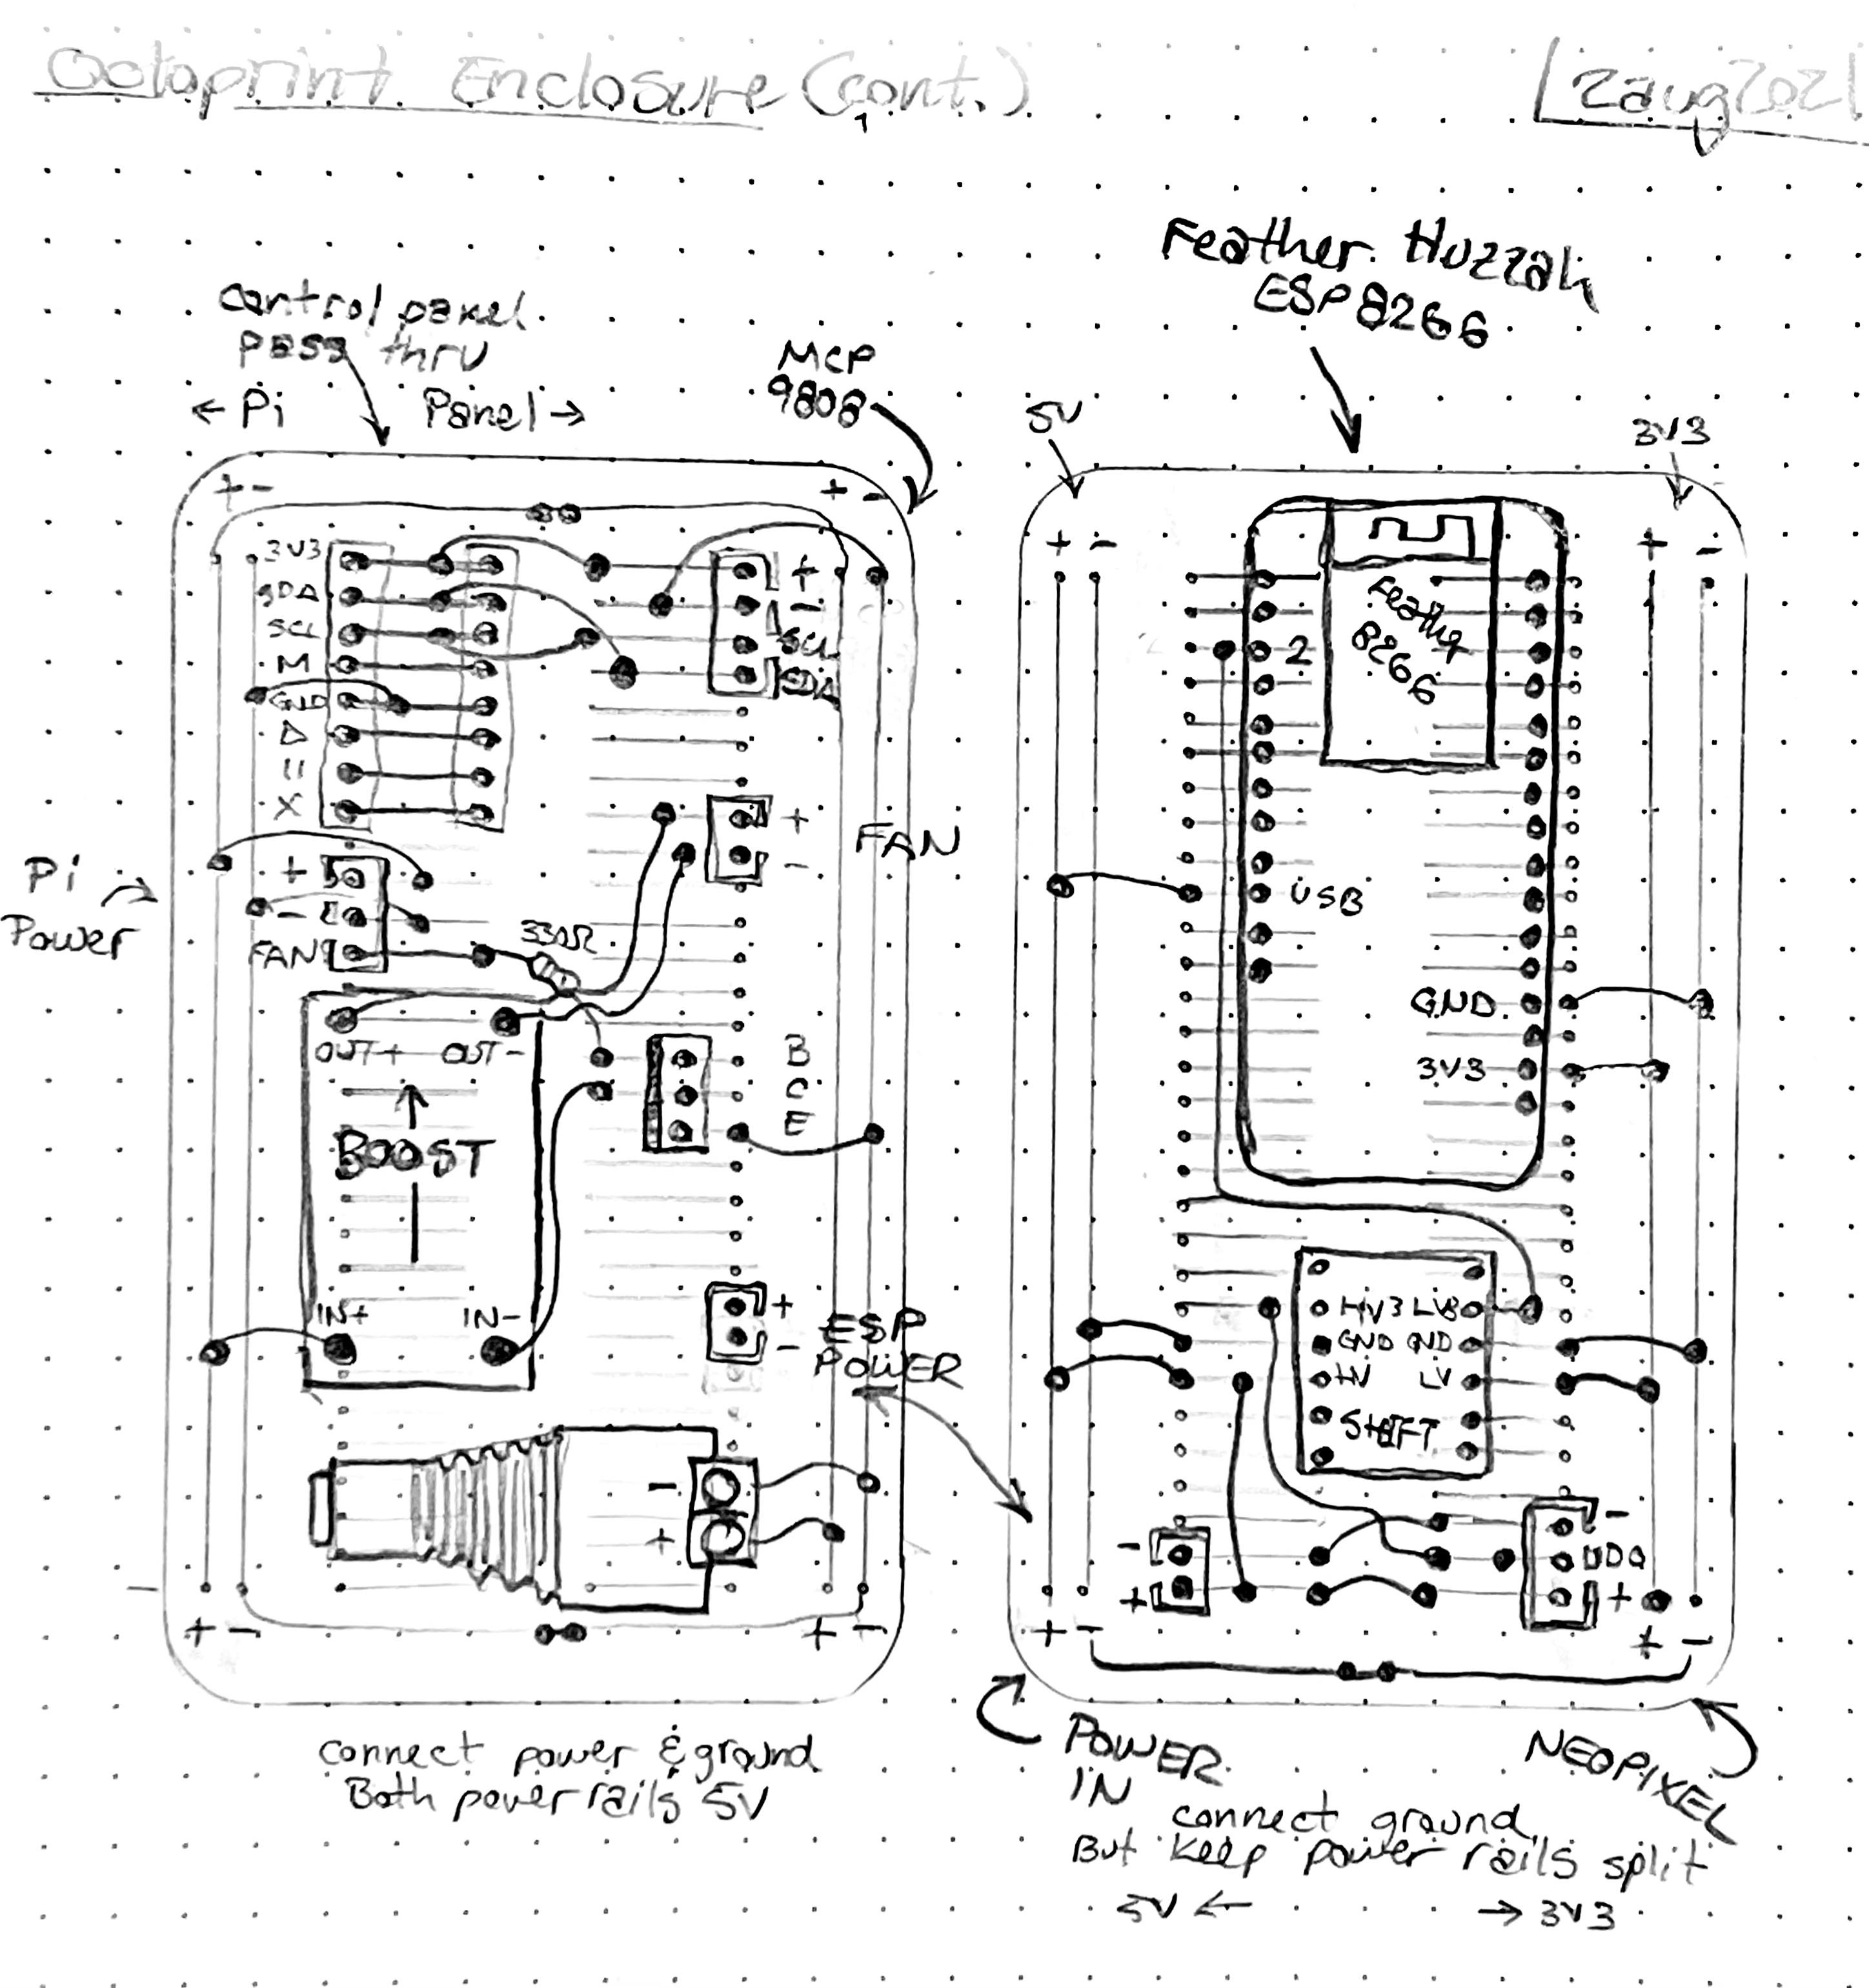 Fig. 4. Initial drawing for breakout boards.
Thankfully, while I had used all of these components before, I had the presence of mind to test it together on a breadboard and validate it as a whole. And I'm glad I did, as I found a few key things that ended up breaking the whole idea apart. The first was that I had initially drawn the TIP120 Darlinton transistor backwards on the board. As I always start with continuity and voltage checking, I caught that before letting any magic smoke out. The second was the boost converter I have is rated for .95A and the 12V fan is 1A. That wouldn't be too bad if it weren't for the boost rating being on the input and the voltage conversion is approximately like a transformer where the voltage being multiplied up means that the current available goes down. Going from 5V to 12V meant that the 1A fan would actually need to draw ~2.4A+ on the input. When testing, this resulted in the overcurrent protection kicking in just as the fan attempted to spin up and cycling like this forever. To make matters worse, I just completely spaces on the purpose of the Darlinton, to switch high currents and not to also switch higher voltages. My input logic was 3.3V off the Pi, and the way the TIP120 is implemented meant that it would only provide 3.3V out, albeit a lot more current than the Pi could supply, despite being hooked to a 5V rail. Scrapping that idea, I went back to the drawing board and decided to just use a relay instead. Normally I prefer solid-state switching as it's silent and fast, this is a case where I didn't care: 3.3V relay coils are generally pretty quiet, and the idea was the fan would only turn on and off at the cadence of a print starting and completing. After validating with a new breadboard test, I draw the new board up.
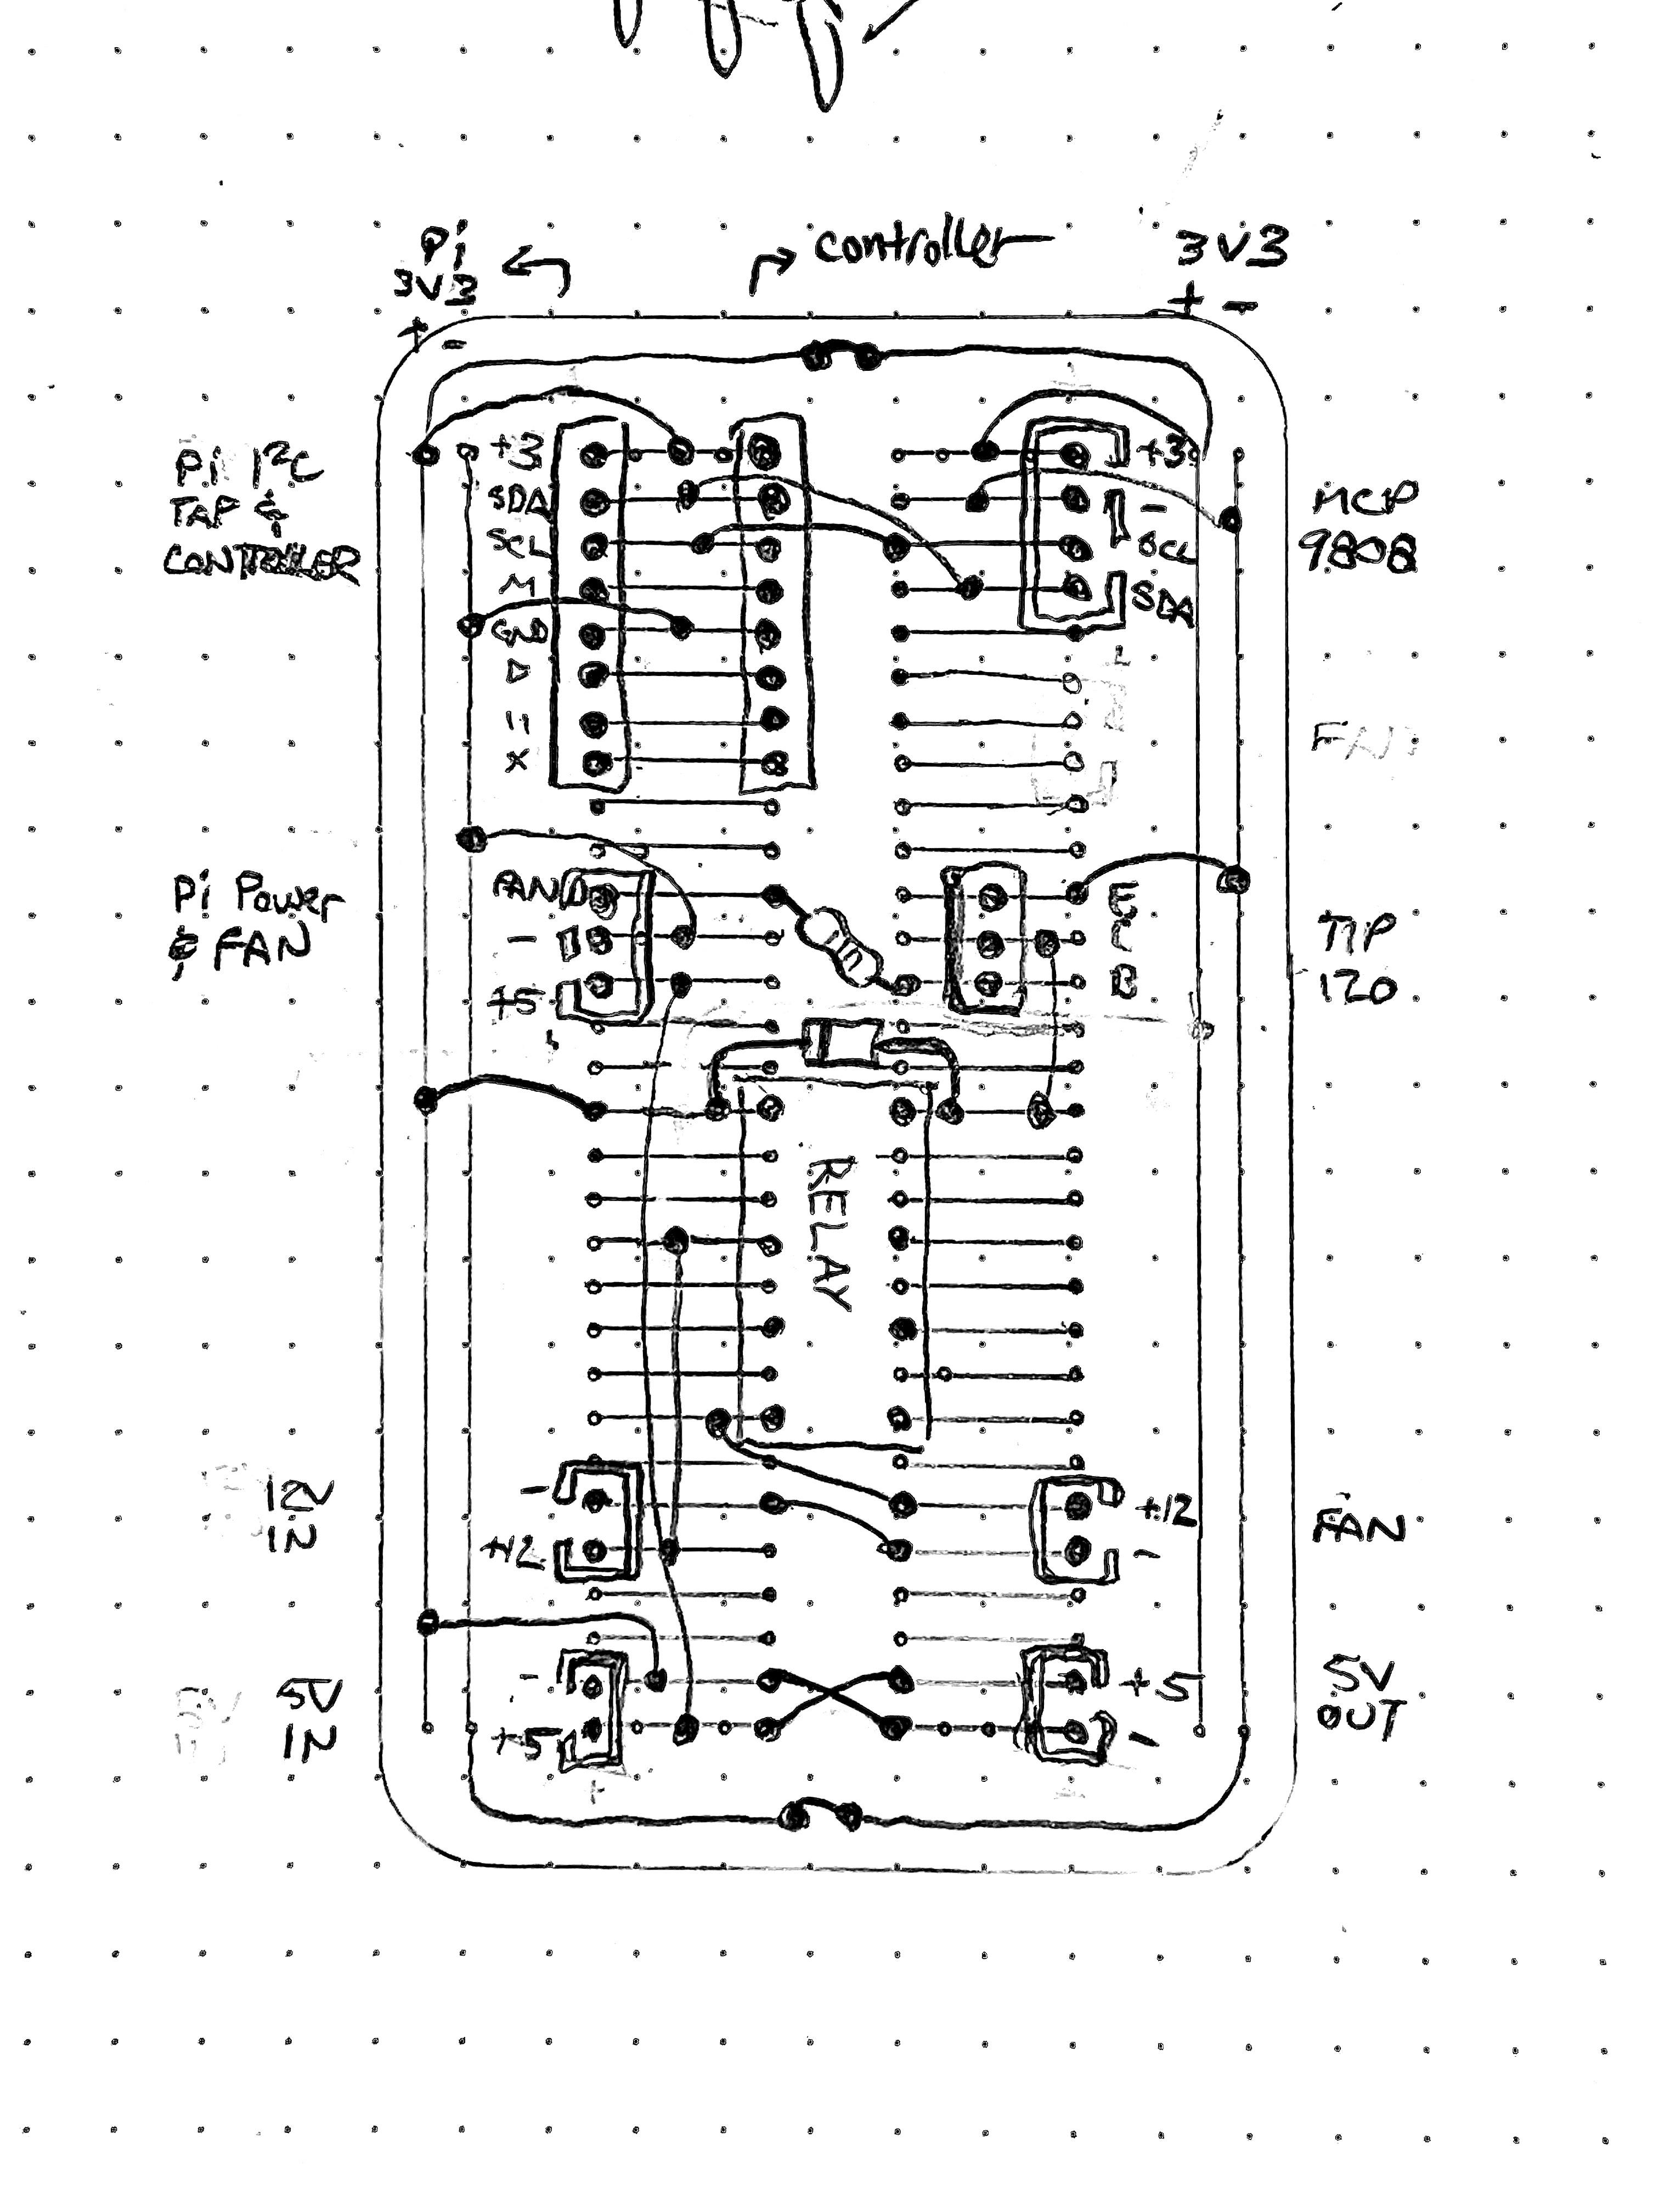 Fig 5. Updated main power board with a relay instead of boost converter.
Finally, I felt confident to start soldering things up and running integration testing with the full enclosure. This is where I should mention that when I first built out the enclosure, my plan was to have my own code on an Adafruit breakout board driving the LEDs for manual animations, as well as taking an I2C line in to be controlled by the OctoPrint Enclosure plugin. The enclosure plugin would be driving the fan, reading the ambient temperature, and it has a basic LED control protocol that can set lights to a particular color. Great! However, when just before I started working on the boards above, I discovered the OctoPrint WLED plugin, that lets you control a WLED instance over your local network to not only do the same status colors, but also set WLED patterns and do them on a specified set of segments. I had been meaning to play with WLED for some time, as it looked like a great bit of firmware and it also meant one less thing to write myself. I enjoy writing code to learn new concepts, but I'd written whole network-connected LED drivers before and didn't really look forward to building another. This killed two birds with one stone and with more capability than I'd originally expected. So with that, I swapped out the standalone board for an Adafruit Huzzah ESP8266, flashed it with WLED, and ran my tests with that. The results were perfect. The board did its job, the lights did theirs, WLED worked like a champ and OctoPrint could coordinate it all together.
 Fig 6. Running the LEDs off WLED, first test a success
Putting it all together was really satisfying. Once I had functional boards, I quickly modeled up a carrying caddy for the solderable breadboard PCBs, crimped up some tidier cables, and hooked it all up for a final integration test.
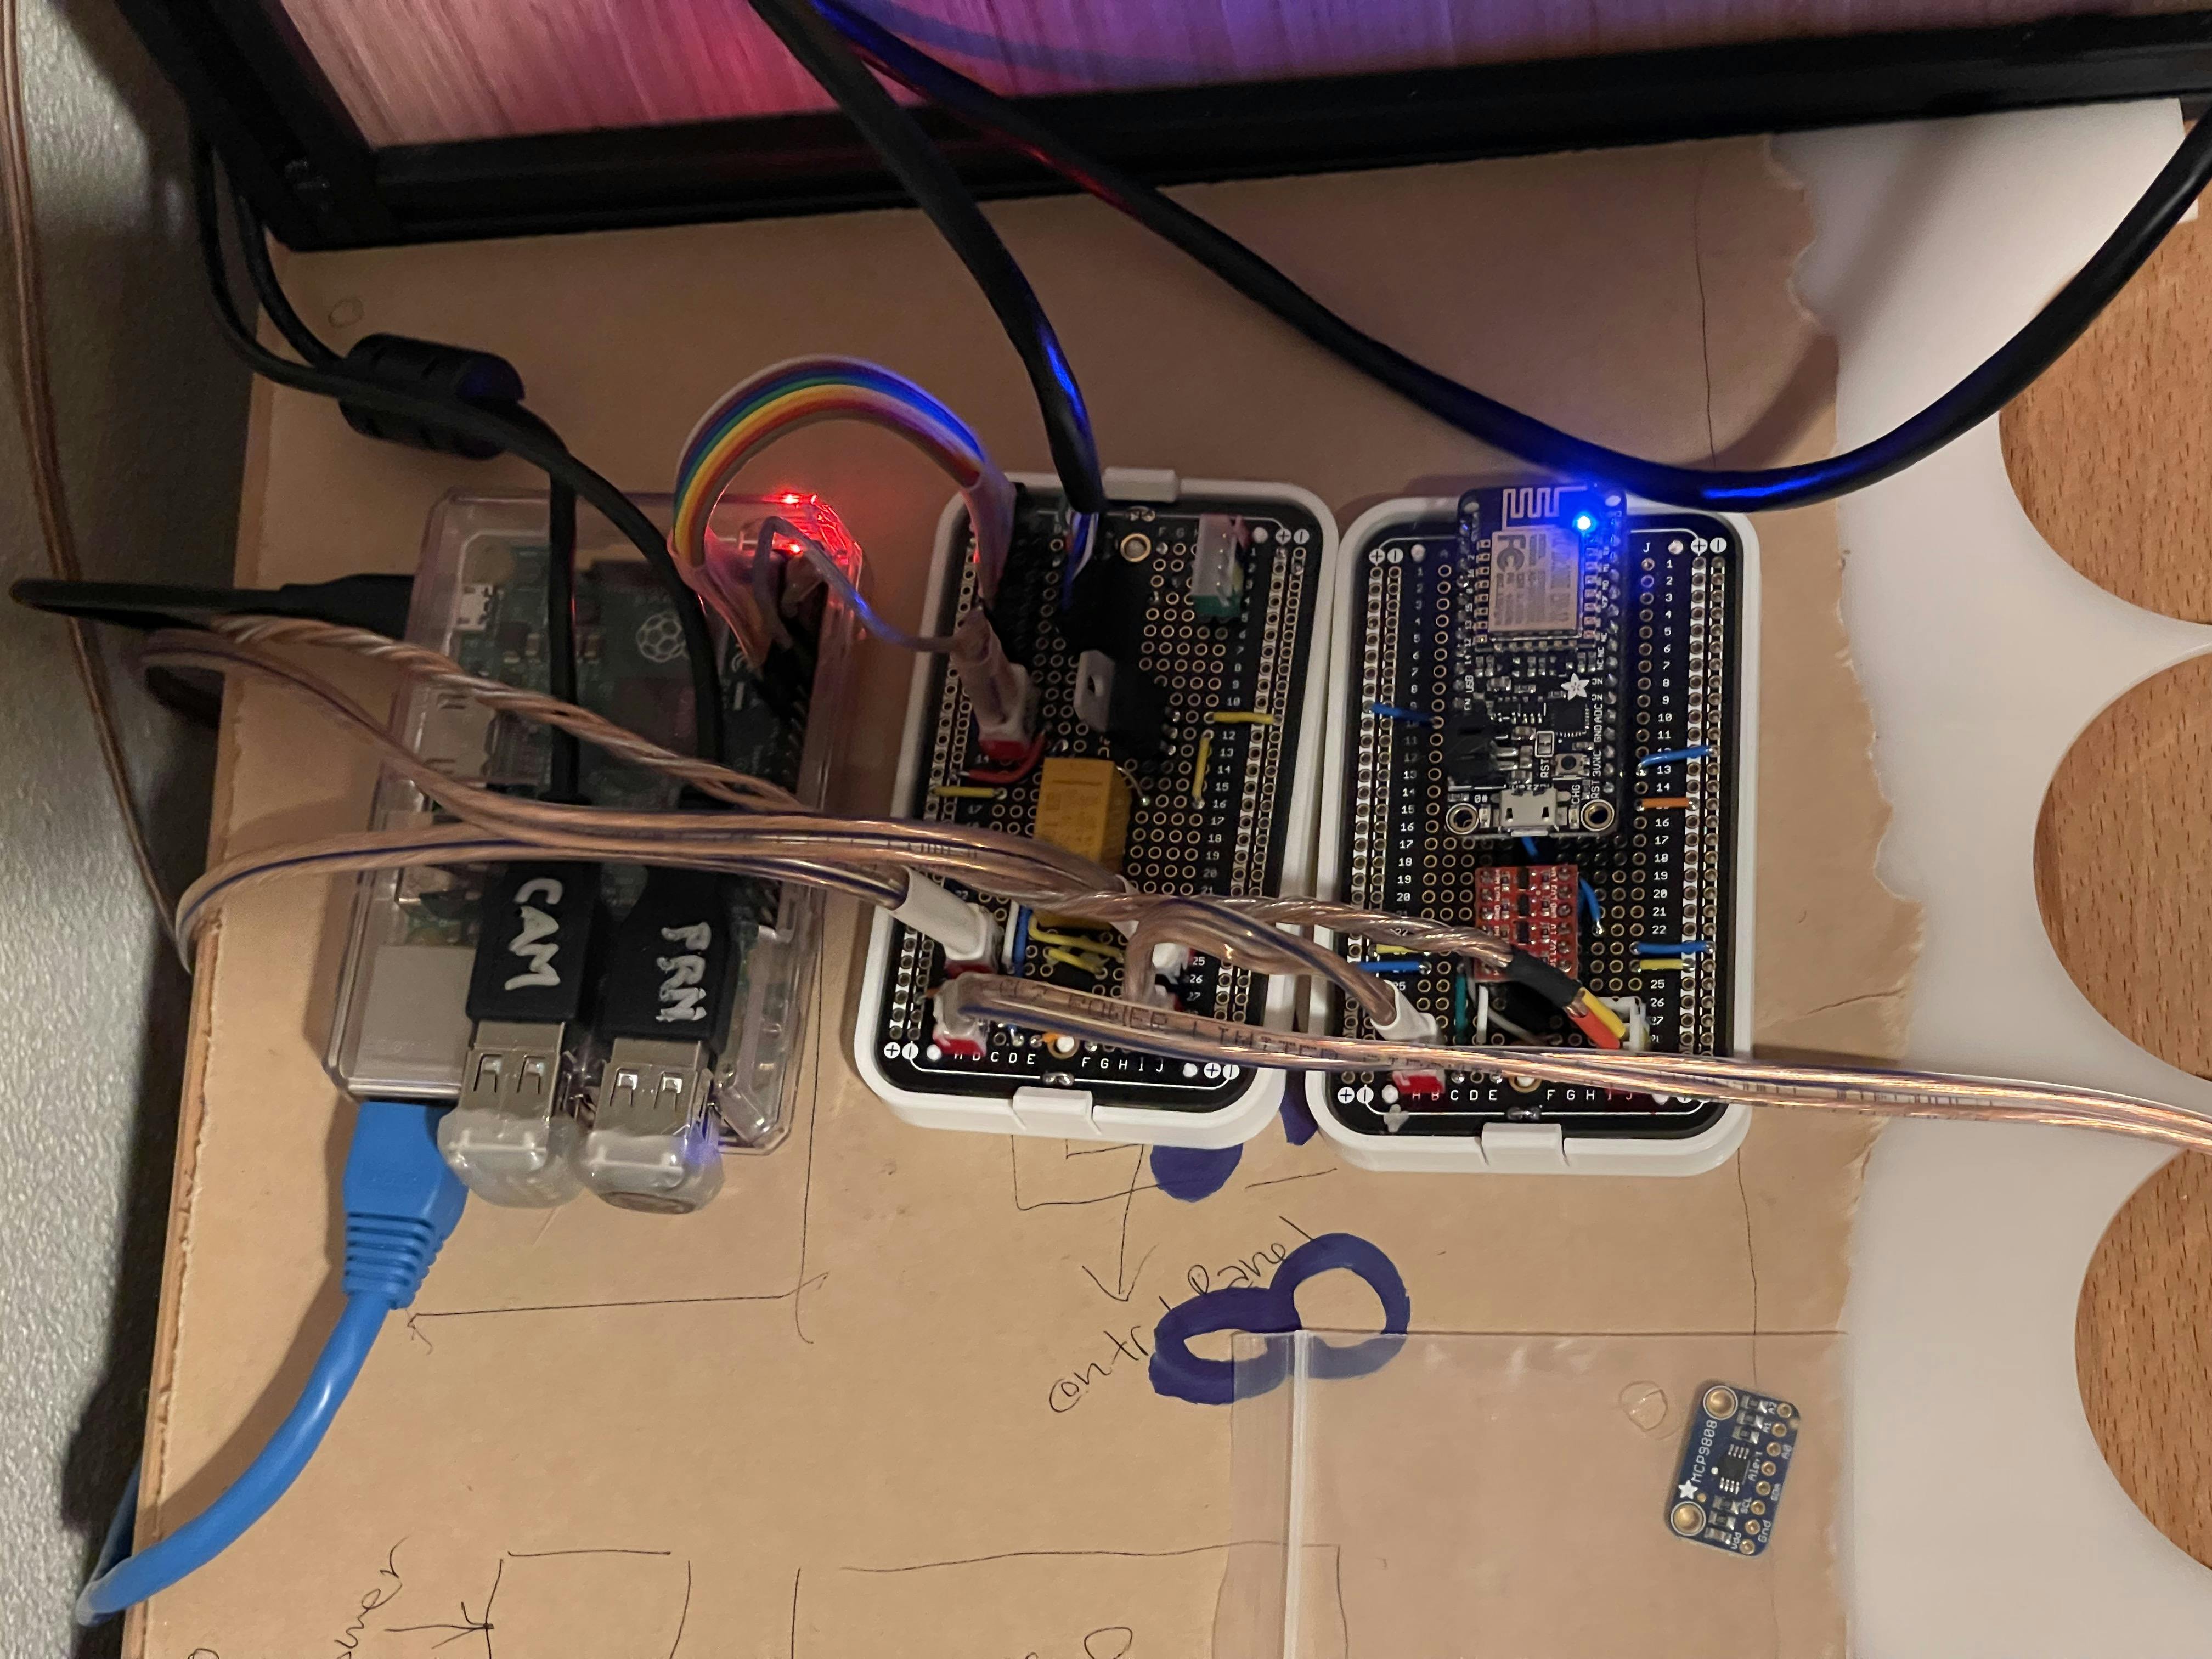 Fig 7. Pretty sharp looking, and sitting on a scrap of acrylic that will become the eventual backer board
Thinking that this was basically it, and all that was left was to mount it to the backer board and bold it to the side of the enclosure, I set out running a couple prints... which revealed the next issue: power losses over the various cables and PCB traces was enough that the Pi was detecting undervoltage conditions whenever the LEDs went all-white. Now, WLED is RGBW aware, and is able to appropriately use the white channel instead of the three other channels when white is requested, and it has built-in brightness limiting when it estimates that too much current is being drawn, but none of those helped, so I suspect it comes down to the plugs I am using with their thin crimped connectors, and the thin traces on the boards. Nothing got hot, it was just enough to pull a clean 5V down enough to cause the Pi distress. So, once again, I changed tact. I tested whether using a normal USB adapter to the Pi was enough to drive it and the webcam attached, and then ensuring I had wired together all the ground connections between the 5V supplies, tested again with the Pi hooked up to the other boards... everything seemed good again so I snipped the power cable going into the Pi from my board and just ran over the fan control. This is where it still stands today.
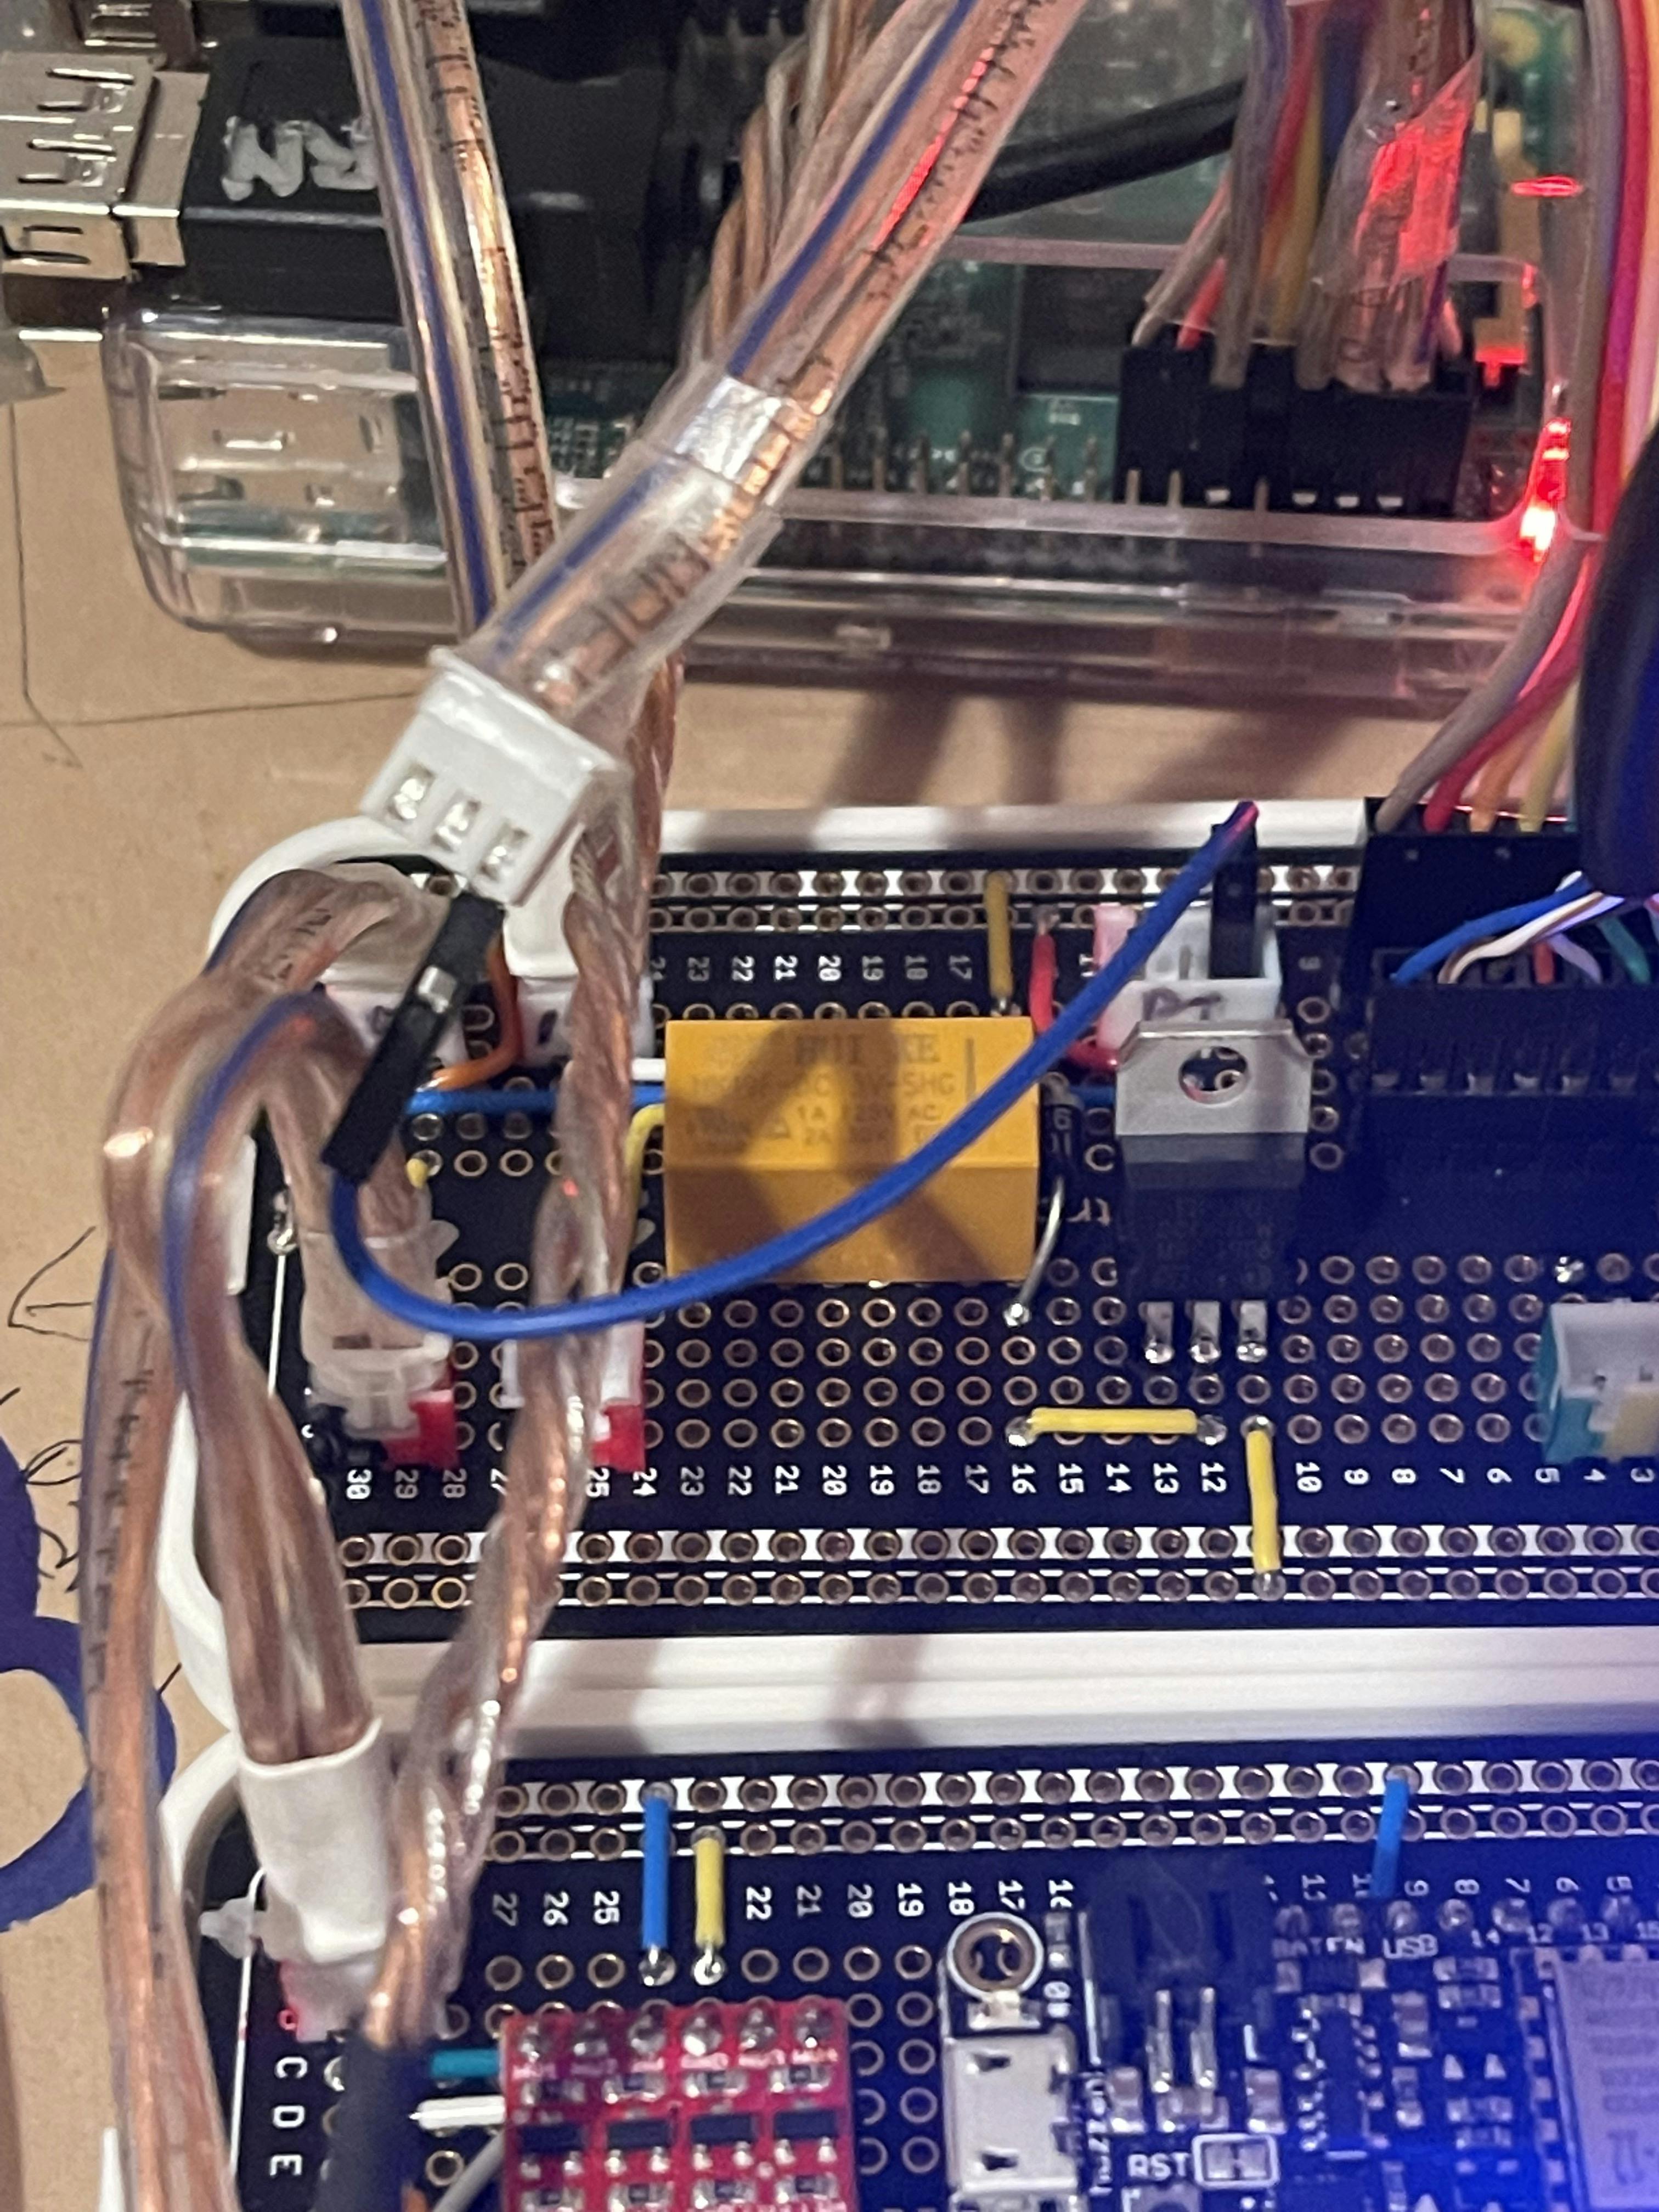 Fig 8. The best laid plans. Testing that it all works without power but with the fan control still wired up.
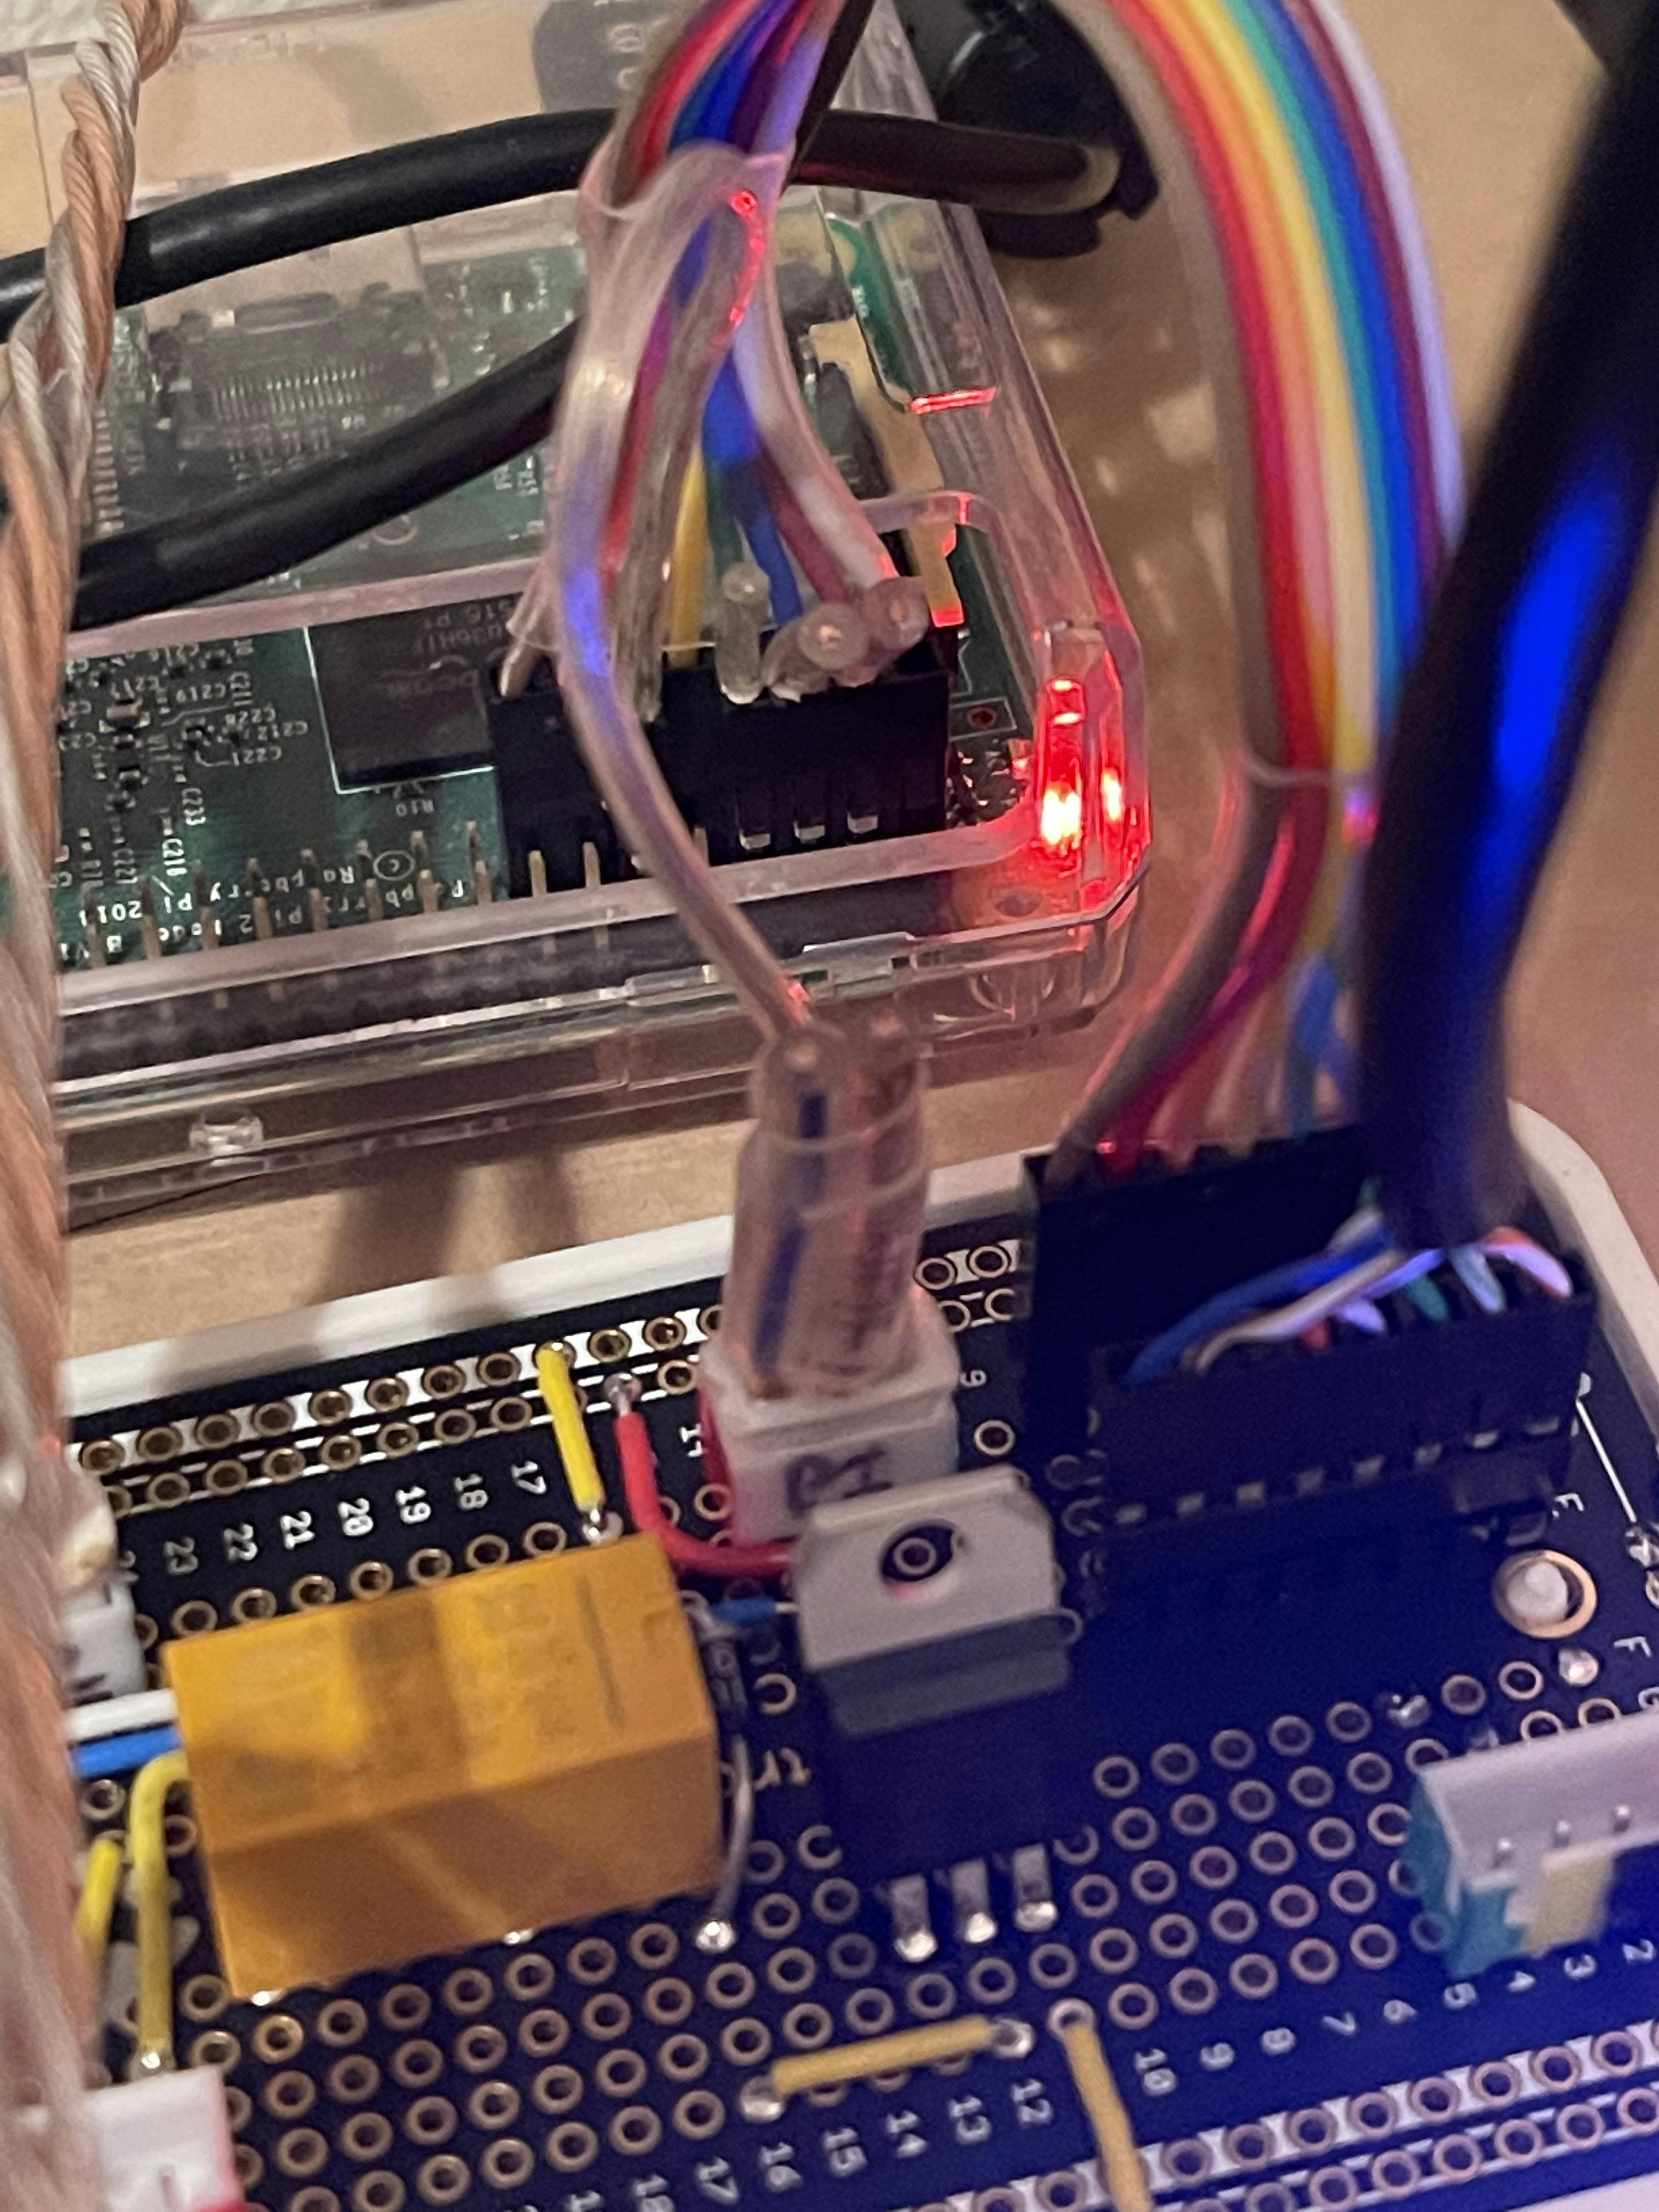 Fig 9. Final solution, cut the power wires and use a USB adaptor.
With all the problems solved, and a few more prints running fine with no undervoltage or other concernts coming up, it was finally (finally!) time to mount it to the enclosure. I ended up doing this in a hurry over lunch, so I don't have any progress photos. Basically, I figured out how much room I needed, added a generous buffer, scored the acrylic and cut it square, then marked where I wanted holes for M5 bolts and t-nuts, drilled it out and tested the mount. With that good, I drilled more holes for a cover that would use some spare threaded rod to offset, transferred those holes to a smaller sheet of clear acrylic and drilled those out. A little hot glue to hold everything in place and some nuts, bolts and threadlock to put everything in place, and it was good enough to call done!
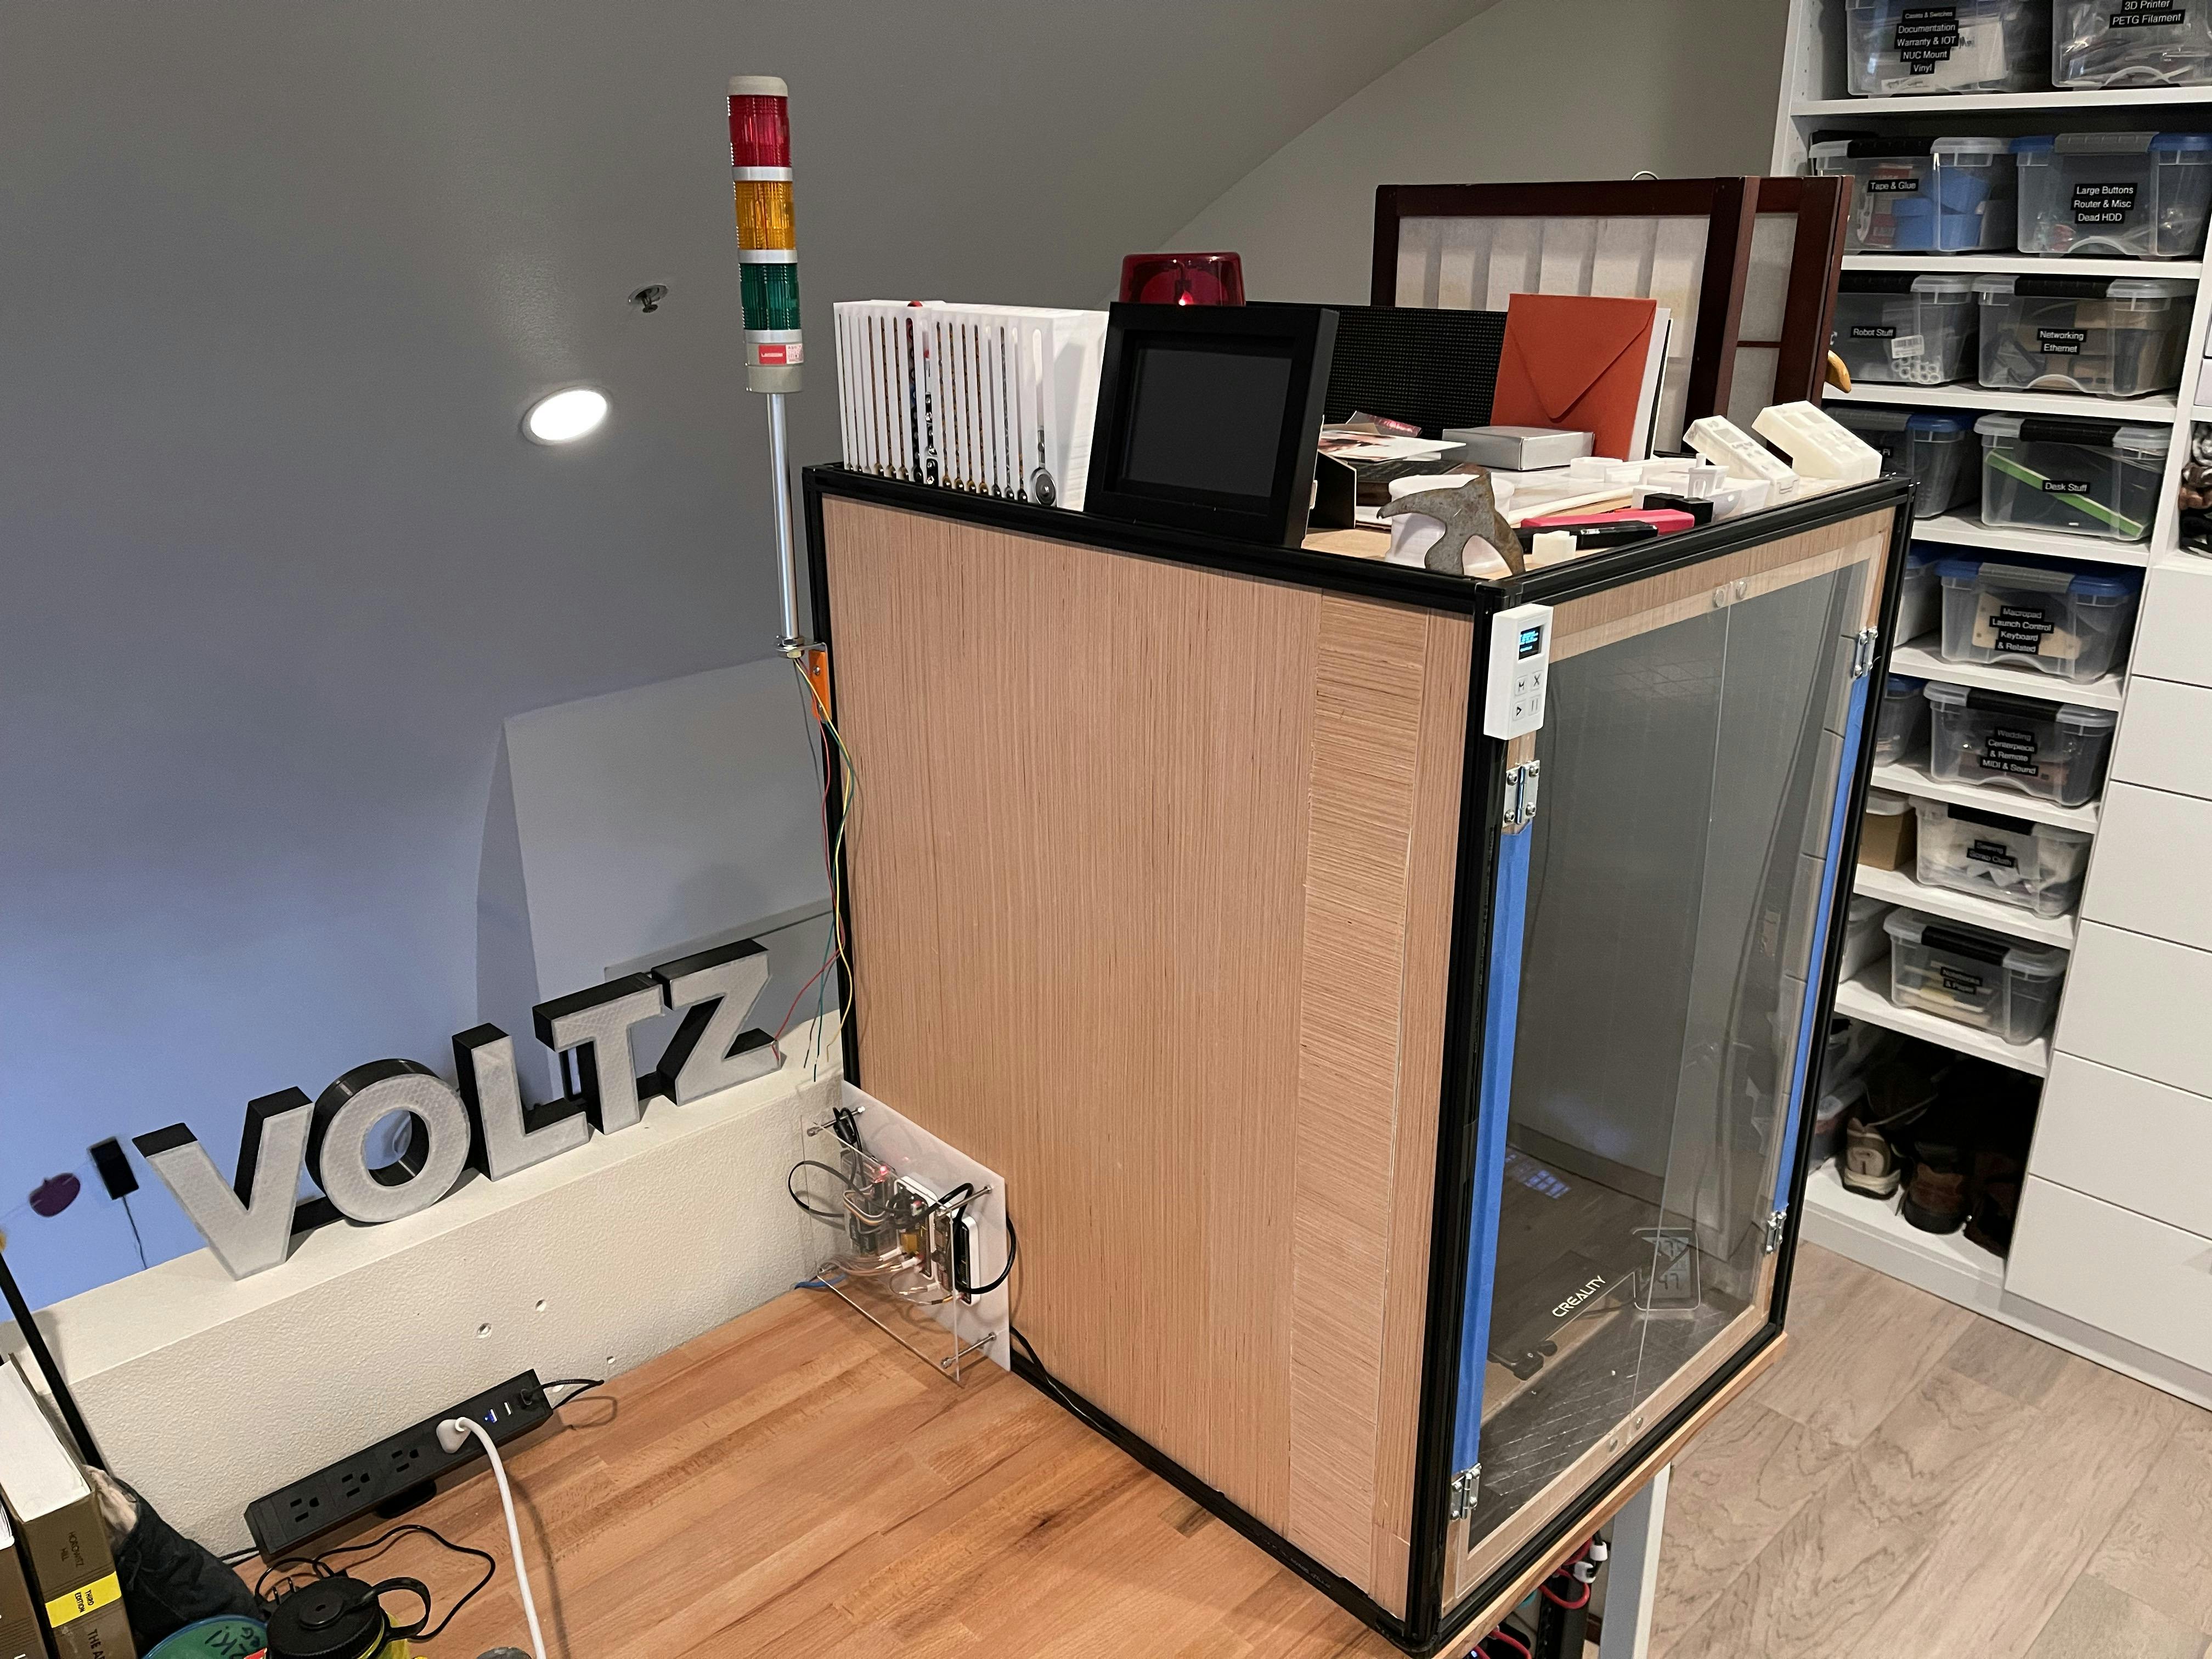 Fig 10. All buttoned up and looking good!
Next Steps
Now, any good project is never done but only done-enough. This one is no different. I still have a running wish list of improvements. Here are some that are top of mind that may make it here in the future:
- Upgrade the doors. The plastic is a cheap, thin sheet from the local HomeDepot and I'd like something more substantial and with handles
- Improved insulation. The foil does a great job of reflecting light and a good enough job reflecting heat. It can get warm but it's definitely not amazing at it.
- Wire grommets on the rear holes. I'd like to finally attempt flexible filaments and that seems like a practical first print.
- Better camera. When every decent webcam was marked up 5-10x, I found this cheap "HD" for <$40. It works but the price is indicative of its performance.
What would you add or change? If you have or are planning an enclosure, what tradeoffs or compromises did you make or discover along the way?
